Now we’re going to set up Buddify AI Widget —it’ll only take a minute! Once completed, no additional setup will be needed in the future.
Prefer watching instead? We also have a Video Tutorial available to guide you through the process if that’s more convenient for you.
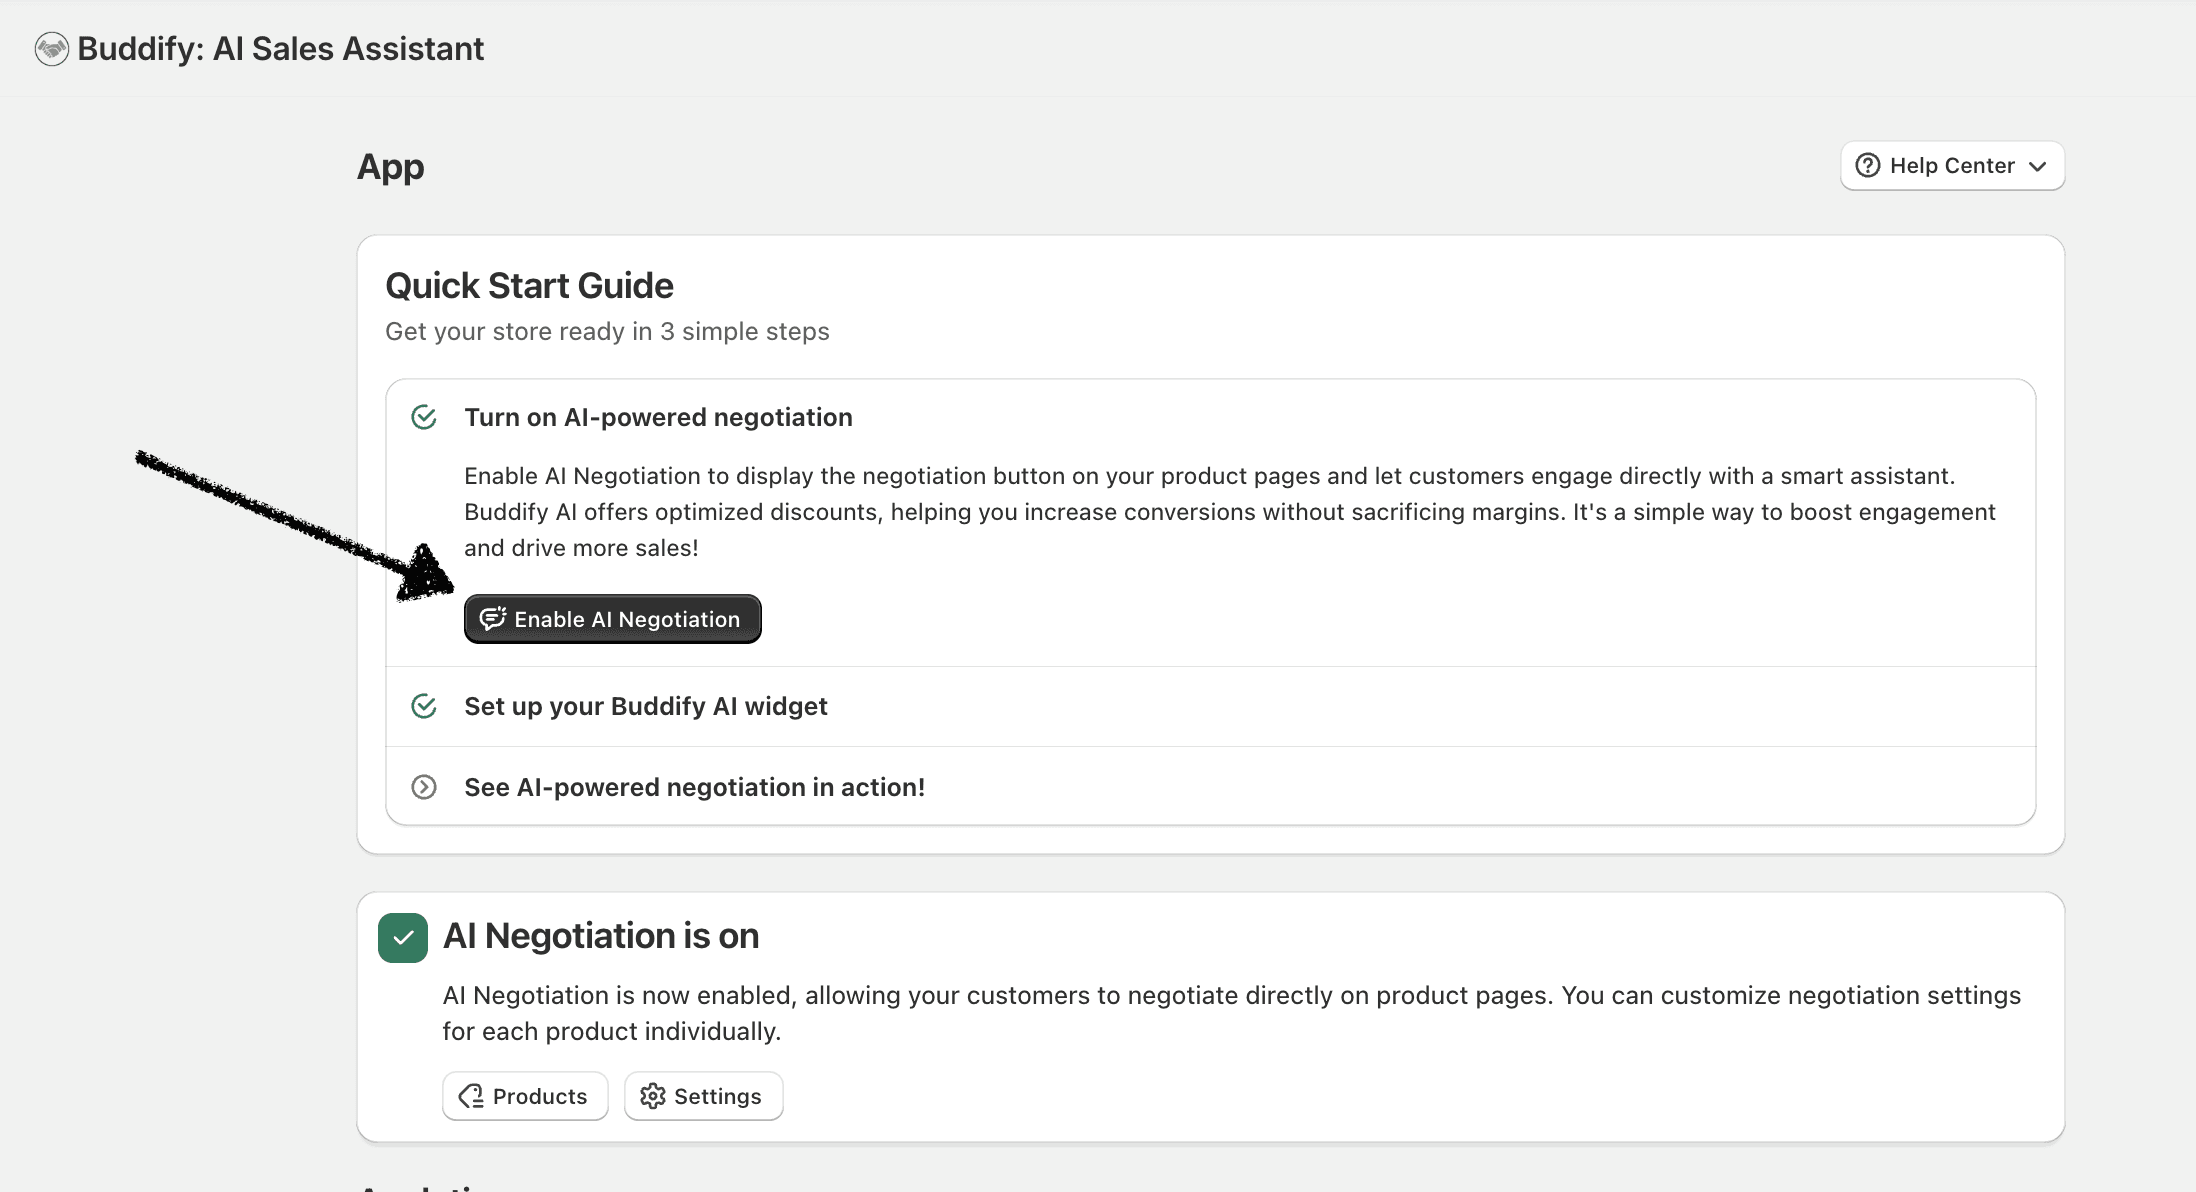
STEP 1: Enable AI Negotiation in the Buddify app settings.
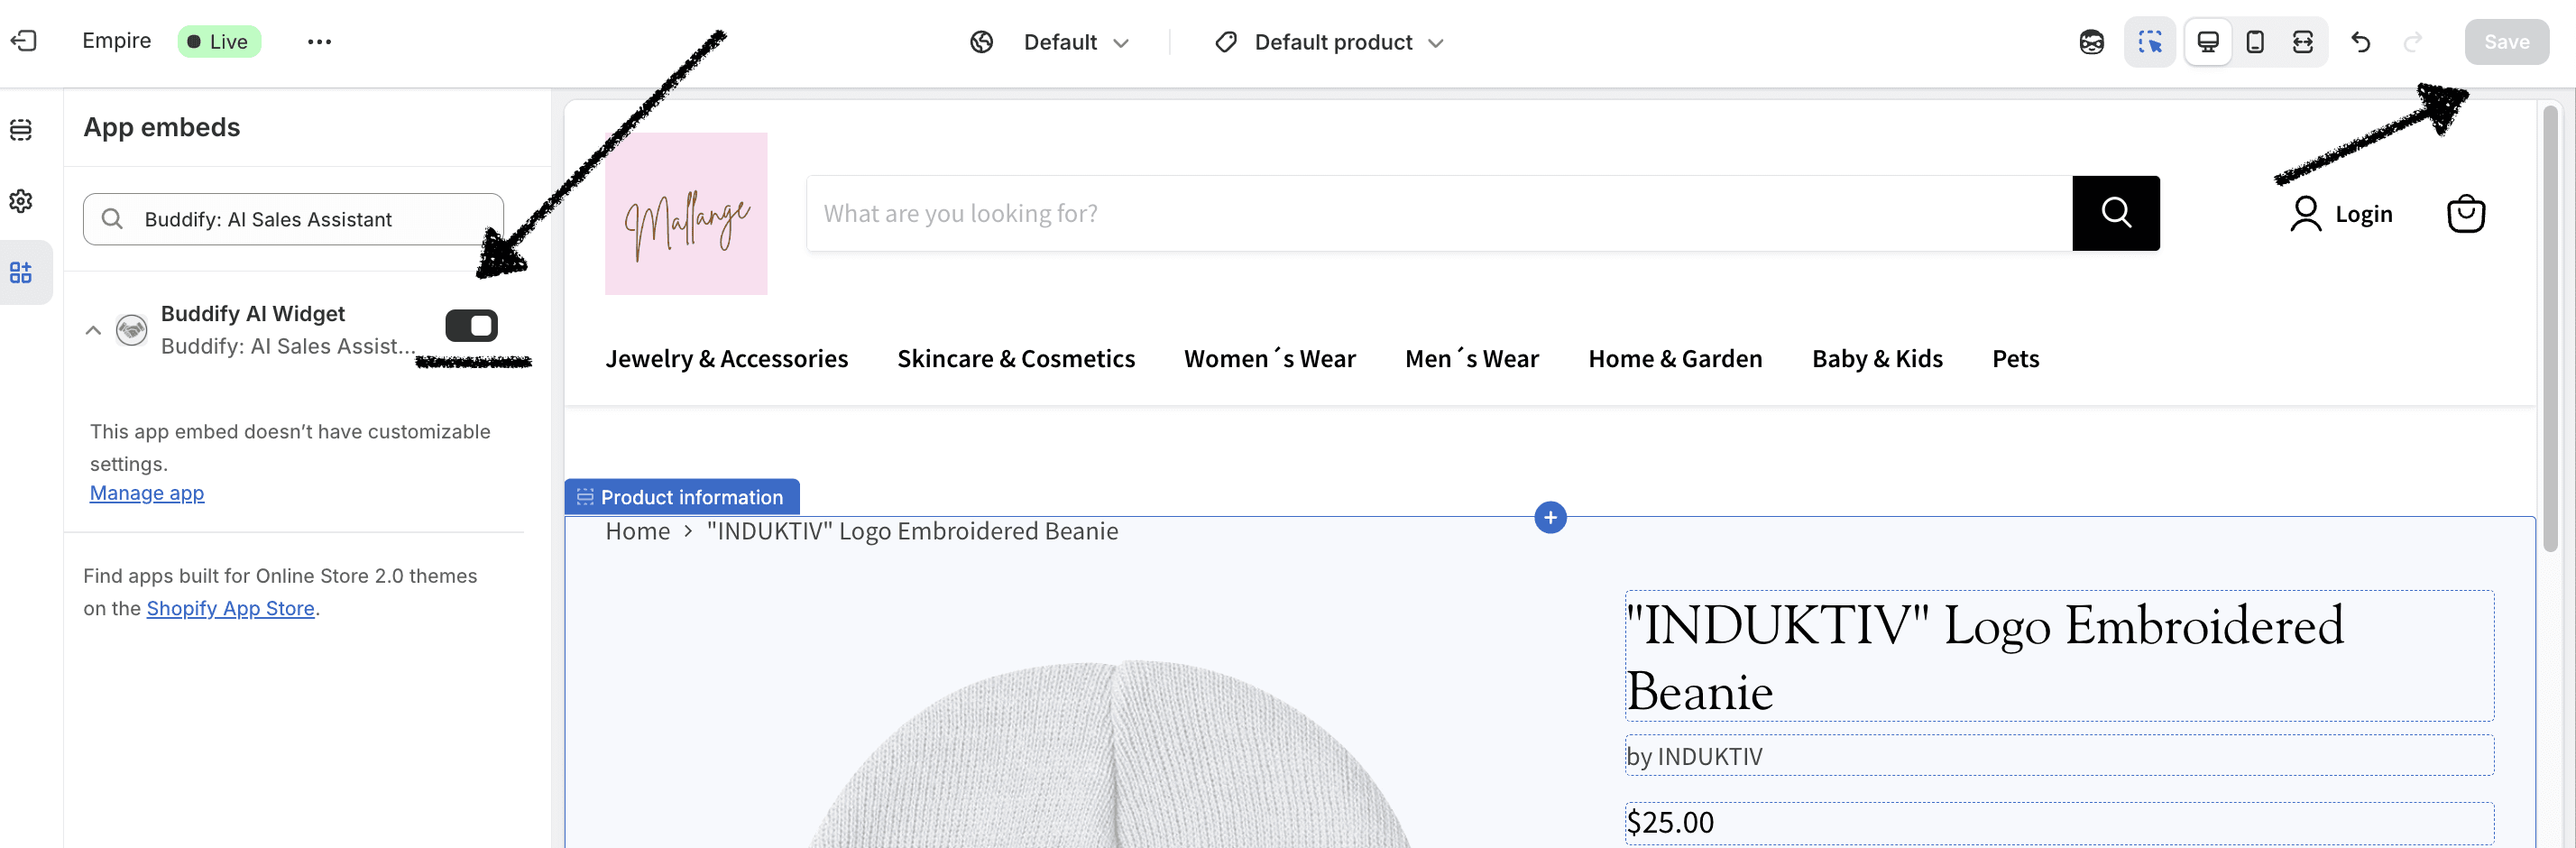
STEP 2: Click on "Activate Widget".

STEP 3: Make sure the widget is activated, then click Save.
If the widget is already active and positioned correctly (as shown in the image), the system may not allow you to save again—this just means it’s already saved. No further action is needed here as long as the widget is activated.
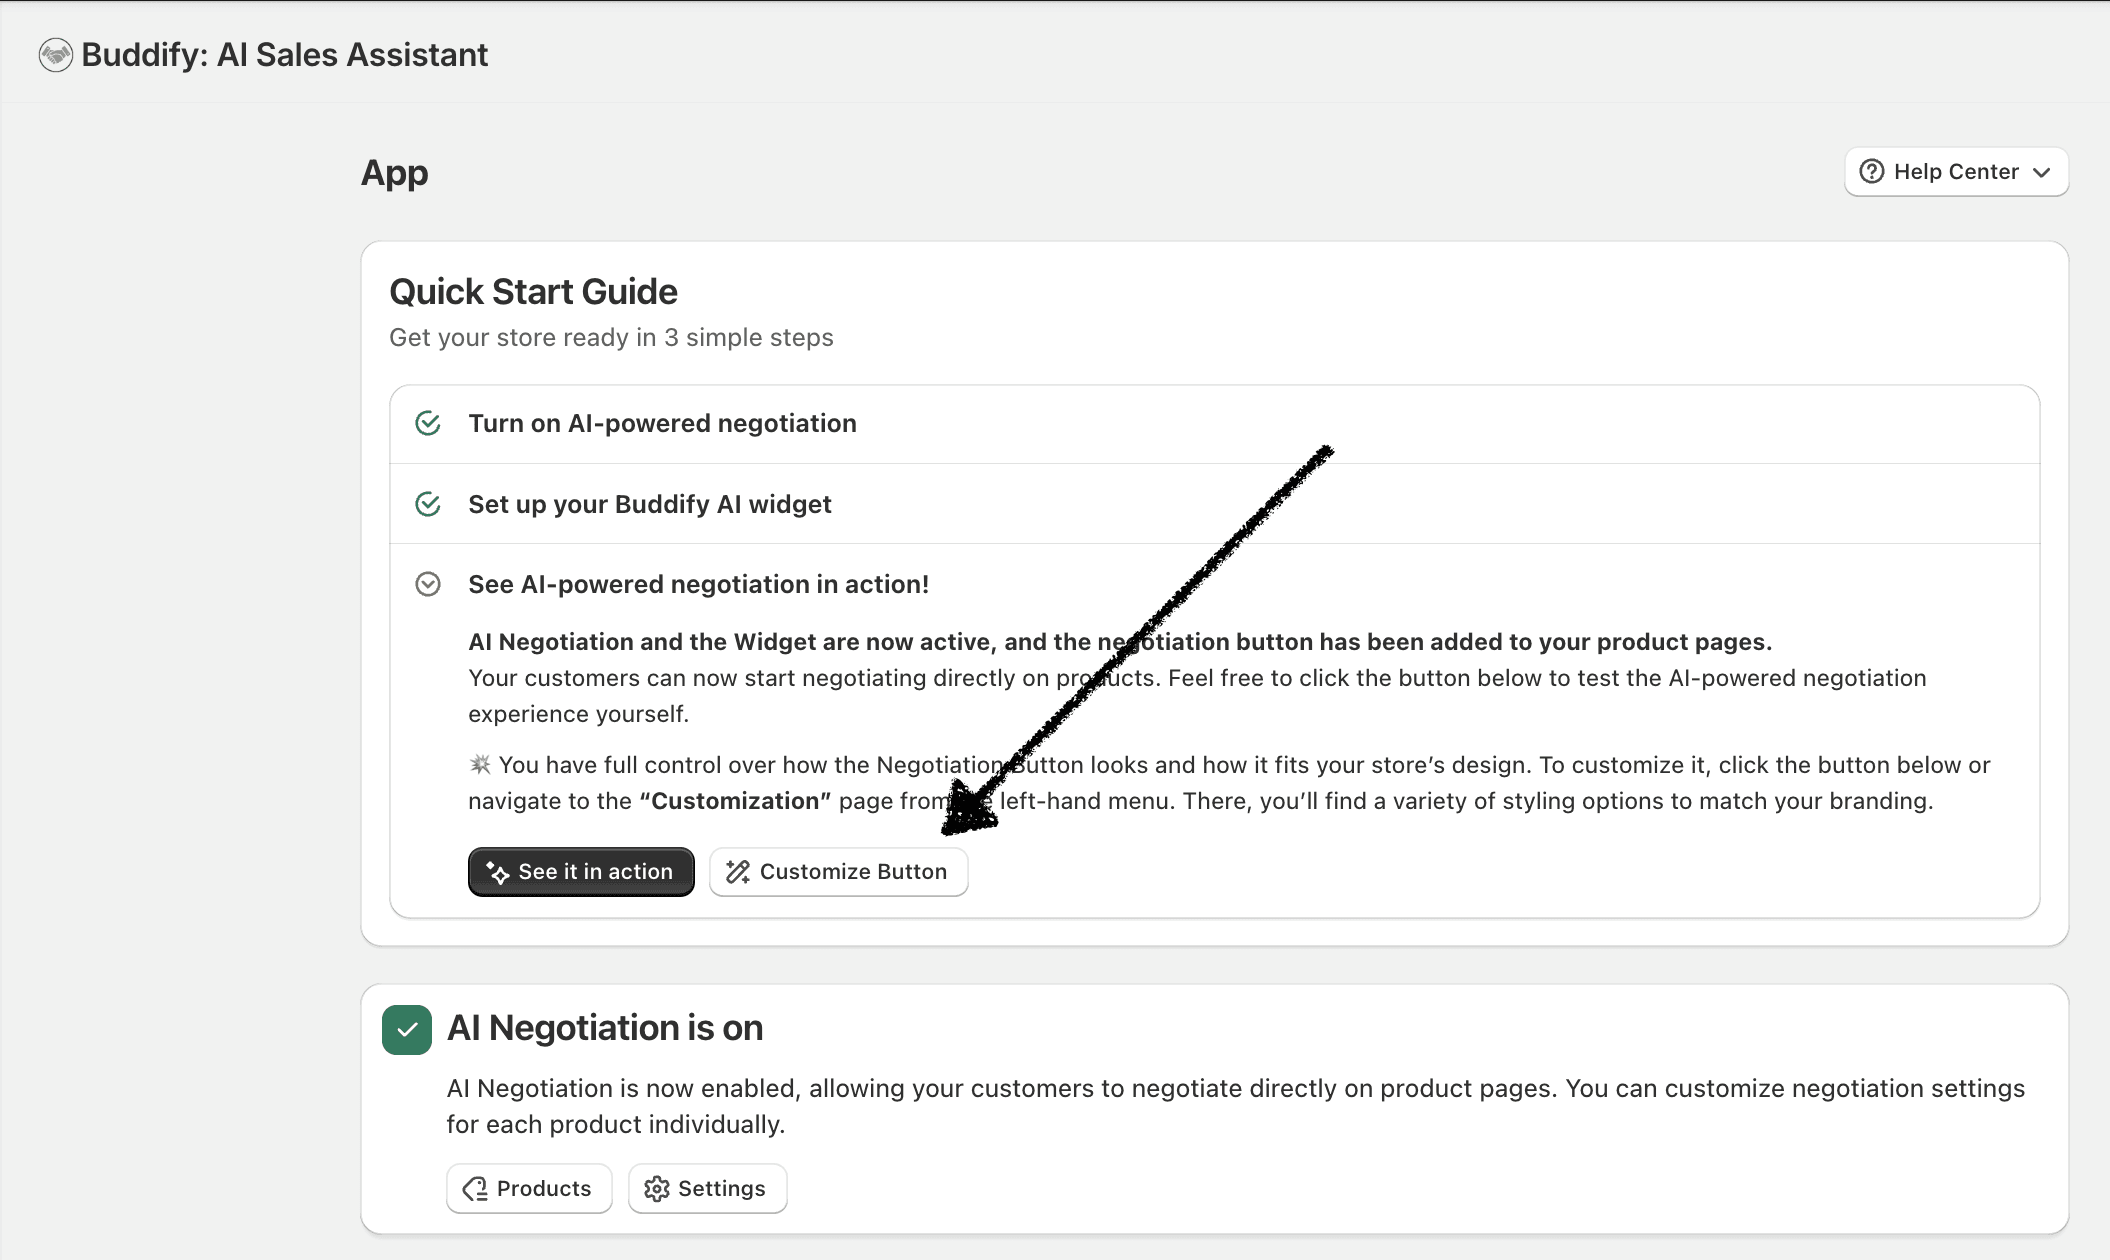
STEP 4: Click on "Customize Button".
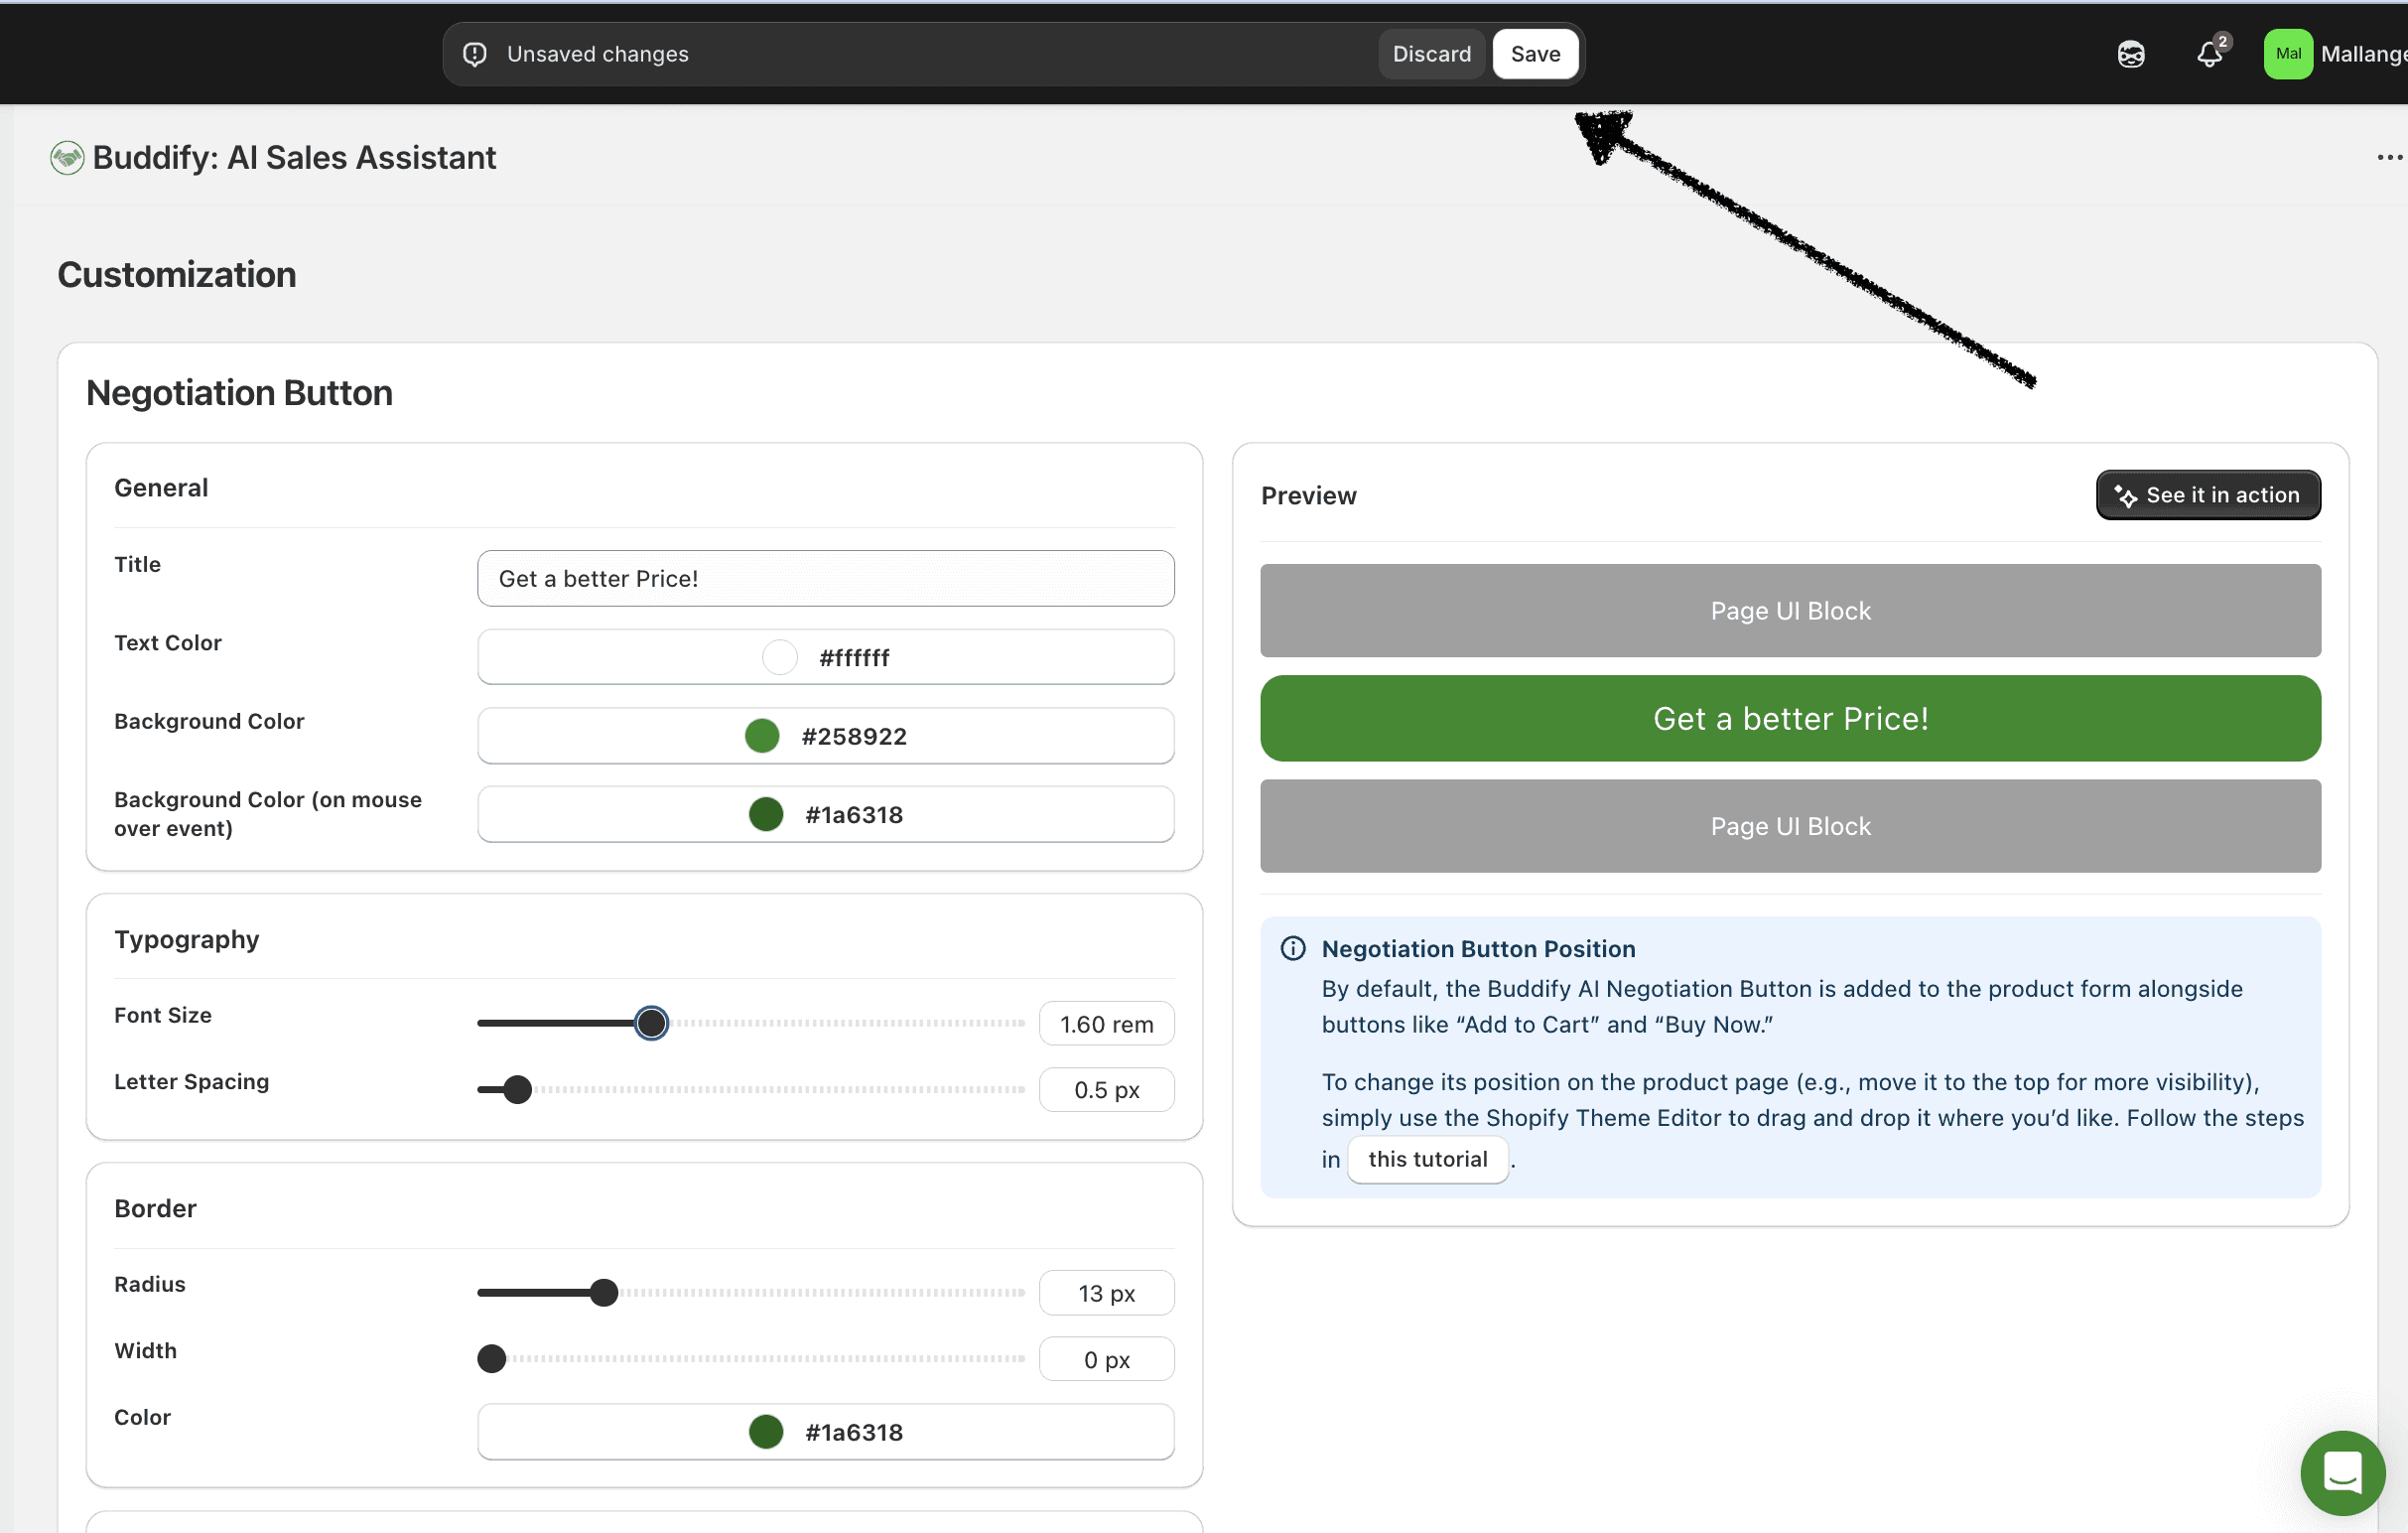
STEP 5: "Customize the Widget" as you like.
You can change the button title, color, length, width, and various other settings to ensure the AI Widget aligns with your store’s branding. Once you make changes, don’t forget to click "Save."